[NVR-400] How to configure the NVR-400 motion detection?
To configure the motion detection of NVR-400, you will need to enable Motion Detection on both your IP cameras and the NVR-400. Please refer to the steps below to know the settings with different IP cameras and your NVR-400.
The flow is as like this:
• Start Motion Detection:
1.Enable Motion Detection in NVR-400
2.Enable FTP Server in NVR-400
3.Enable and Setup Motion Detection in your Camera
4.Enable and Setup FTP Upload in your Camera
5.Start Job from NVR-400
• Stop Motion Detection:
1.Disable Motion Detection in your Camera
2.Stop Job from NVR-400.
The following shows the steps and the screen snapshoot.
• NVR-400
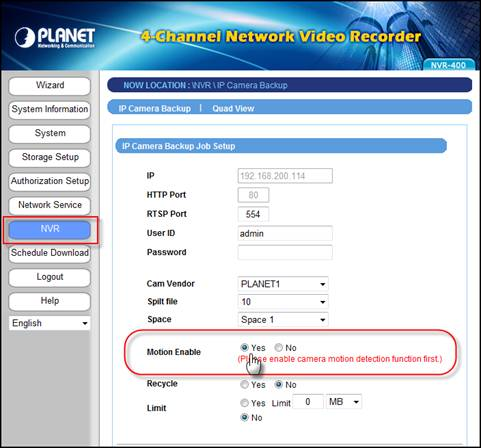
1.At NVR page, please click “Yes” in Motion Enable item.
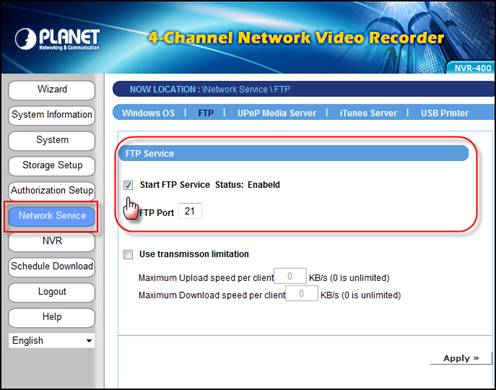
2.At Network Service page, Please Enable the FTP Service.
• Example on ICA-530
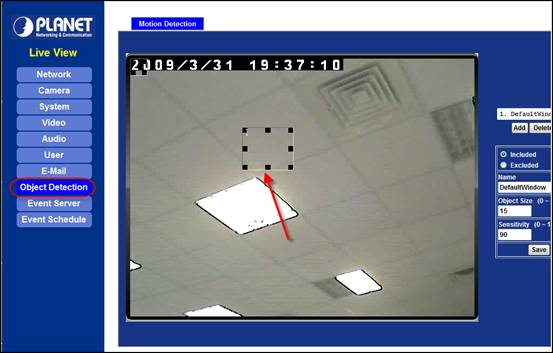
1.Login ICA-530 and set up an object detection area.
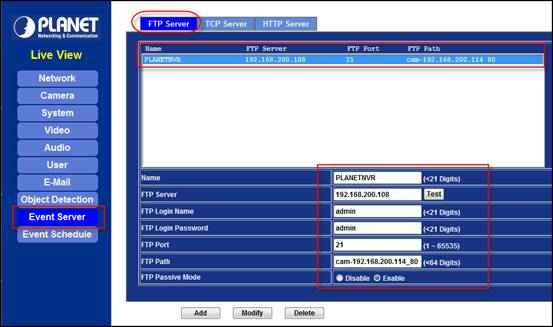
2.At Event Server page, please add NVR as the FTP Server.
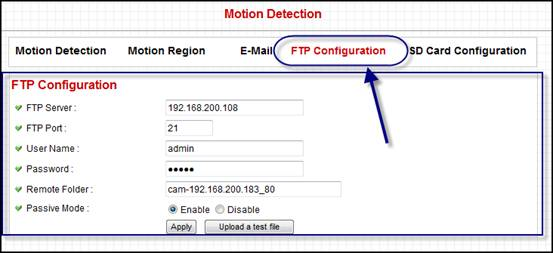
Notice that the FTP Path must be the corresponding camera folder. Please refer to the user manual for more about the Camera folder or double check the folder from NVR-400 in advance.
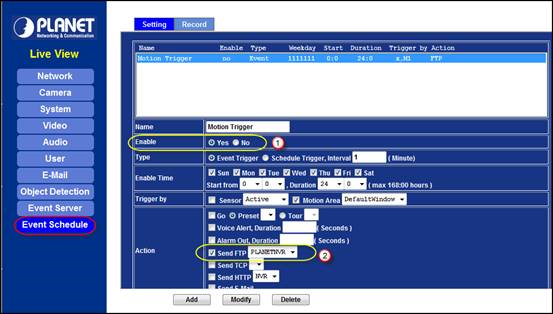
3.At Event Schedule page, firstly enable the motion detection. Then, select the item of Sending FTP.
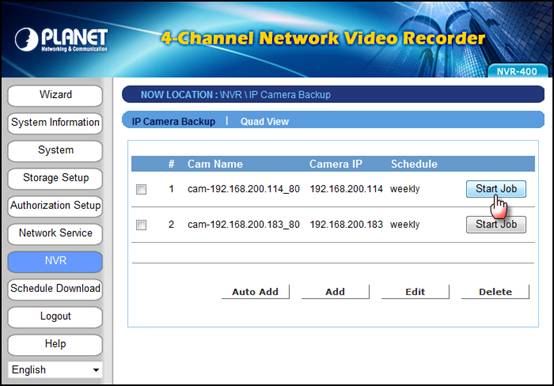
4.Go back to NVR page and click start job.
Notice that if you want to stop motion detection, please stop this setting from ICA-530 first. Then click the stop job button in NVR page after.
• Example on ICA-M220
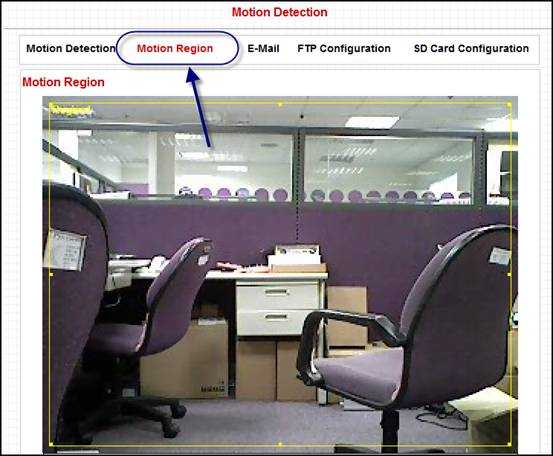
1.Login ICA-M220 and set up an object detection area.
2.Please add NVR as the FTP Server.
3.Enable motion detection and select the item of Send snapshot file to FTP.
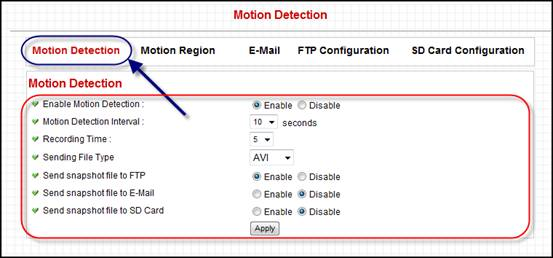
4.Go back to NVR page and click start job.


