How to setup camera port forwarding with DDNS?
Topology:

Configure the router
Step 1: Go to the WAN setting page to configure the WAN interface, after setup finished please check PC A could go to internet.

Step 2: Go to the NAT > Virtual server page to setup the port forwarding feature, in this case the camera IP address is 192.168.0.2, it have to enable the web port and RTSP (video stream) port as below, if the web port or RTSP port of camera aren't the default port, you have to check which port does this camera used. After setup finished, try to use PC B to type http://"Public IP address":8888 to check whether can connect to camera.

Configure the camera
Check the DDNS setting of camera, we just use Planet DDNS and easy DDNS to make some explain. Here are some steps for Planet
DDNS as below:
Step 1: Enable DDNS option through accessing web page of camera.
Step 2: Select on DDNS server provide, and register an account if you do not use yet.

Here are some notes for setup the DDNS account, for security reason we keep some key word, so if user use these key work to be their Planet DDNS domain, they will fail to register to DDNS server. Please make sure you didn’t apply those strings in your DDNS account.
$protectNameString = "(www)|(dns)|(mail)|(planet)|(update)|(address)|(apache)|(mysql)|(server)";
Ex:
Ridns123.planetddns.com => it will fail to register Planet DDNS server
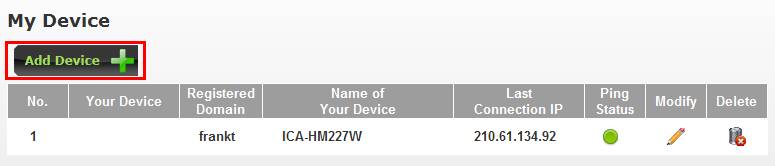
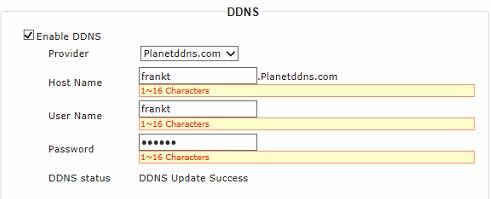
Step 3: Add the register domain and device's name, if the DDNS work properly, the ping status should be green and you also can see the DDNS update successful in your camera DDNS page.
DDNS page
Camera DDNS page
After check the DDNS status, PC B could type http://"DDNS domain":8888 to connect with camera.