[WNAP-6306] How to setup WISP (Client + Router) connection
Topology (WNAP-6306 acts as WISP Client):

STEP1. Use static IP in the PCs that connected with WNAP-6306, in this case configured to “192.168.1.100”.
※ Please be note that the IP address of PC should be configured to the same IP segment as WNAP-6306.

STEP2. Login to the Web page of the WNAP-6306. Then, go to “Internet Setup-> WISP Status” to enable WISP mode.
Before configure the WISP connection, you should check the following settings with your ISP:
1) The SSID of the WISP AP
2) The encryption method and security key of the WISP AP
3) The WAN connection type
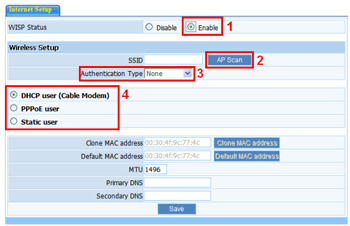
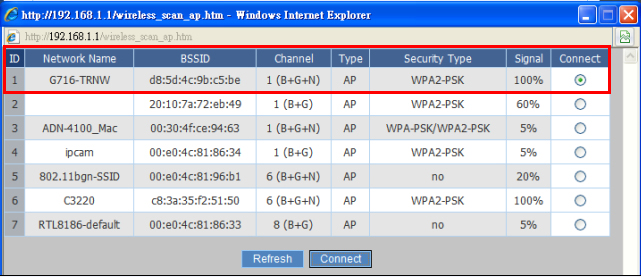
STEP3. Click “AP Scan” to find the WISP AP, and then select it to establish the connection.
In this case, the WISP AP has encrypted to WPA2-PSK, so, you have to configure the Security key in next step.
STEP4. In Authentication Type, select “WPA2 PSK”, and then select the Encryption Type and enter the Key.
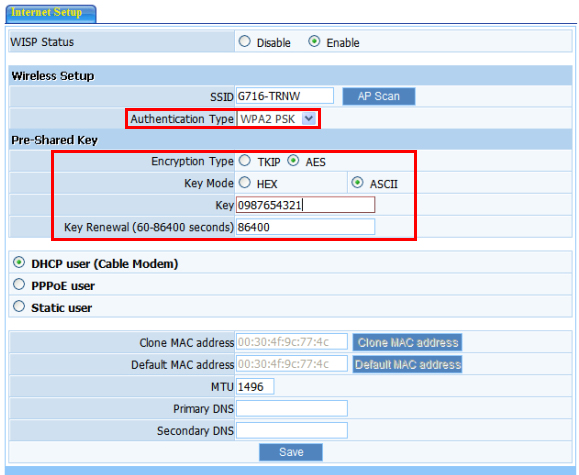
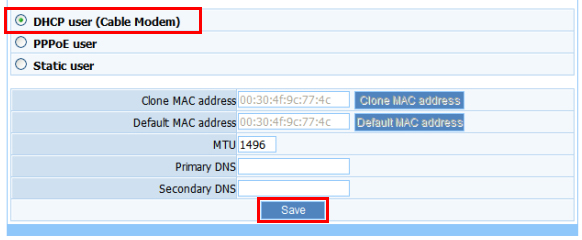
STEP5. In WAN connection type, select “DHCP user (Cable Modem)”, and then save and apply the setting.
In this case, the WAN type is DHCP.
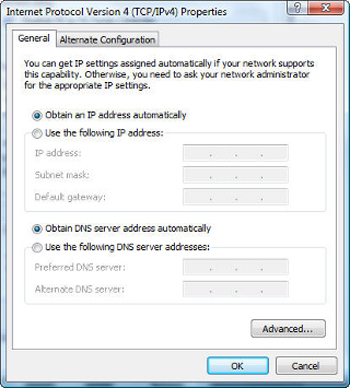
STEP6. Modify the TCP/IP settings of PC to “Obtain an IP address automatically”.
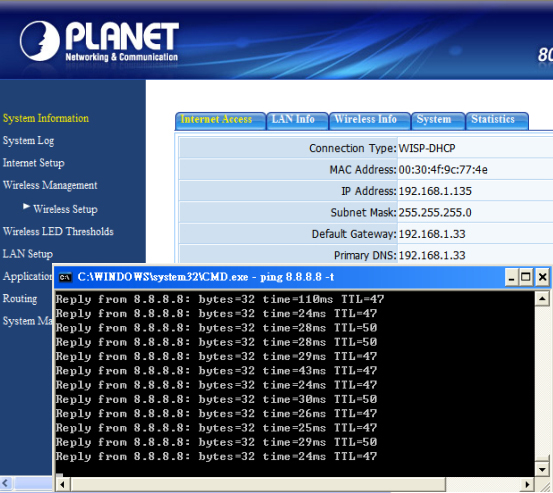
STEP7. After get the IP assigned by DHCP Server, use command line tool to ping DNS server to ensure the internet connection are established successfully.
Note:
1)The WAN connection type should be configured properly so that the Client can access internet via WNAP-6306 successfully.
2)The encryption method and the security key should be the same as WISP AP.
3)The DHCP server should be enabled in WNAP-6306.
