[IPX-Series (V3)] How to set up SIP trunk on PBX (V3)
Please follow the steps below before starting the setup:
1. The PBX must have a public IP address even it is connected behind a router.
2. Using a computer to test whether the routing table is successful or not.
3. The dial pattern must be correct.
4. For this demo, disable the following authentication domains:
PBX A Server: 192.168.1.240
PBX B Client: 192.168.1.241
IP Phone A: Ext. 104
IP Phone B: Ext. 204

Step 1
Creating a SIP trunk as Server Mode on PBX A.

Creating a SIP trunk as Client Mode on PBX B.

Step 2
Checking the status.

Step 3
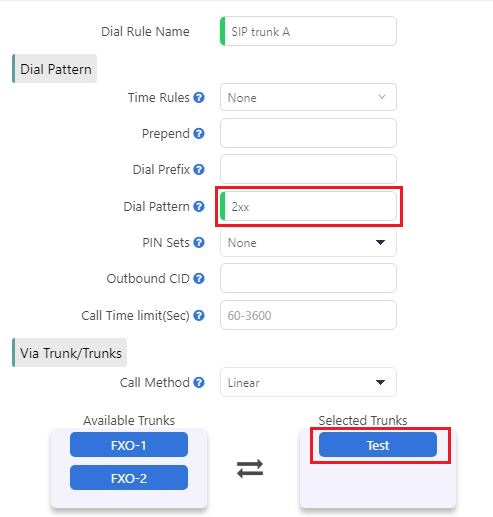
For example, Company A’s extension number range is 100~199, whereas Company B’s extension number range is 200~299.
Setting the dial pattern “2xx“on PBX A, and select PBX B for trunk.
Set the dial pattern “1xx“on PBX B, and select PBX A for trunk.

Dial pattern table
X matches any digit from 0-9.
Z matches any digit from 1-9.
N matches any digit from 2-9.
. wildcard, matches one or more characters.
! wildcard, matches zero or more characters immediately.
Step 4
Set dial permission on PBX A.

Set dial permission on PBX B.

Step 5
Apply the Dial Permission on PBX A.

Apply the Dial Permission on PBX B.